What’s the best way to insulate your house?
We have established that the most important thing is to insulate your house, but where do you start?
It can help to think strategically about which parts of the building to insulate first. The walls are the biggest source of heat loss, followed by the roof, then the floor, and then windows. Windows therefore are much less of a priority than the walls, roof and floor, and given that double glazing is comparatively expensive it is not usually the most economic solution. However, it is one of the simplest. In a lot of old buildings, the walls are solid with no cavity, so they need to be insulated externally or internally, which changes the look of the building or has a serious impact on the use of the building.
So what is the most economic solution for each building type?
All houses
Roof insulation
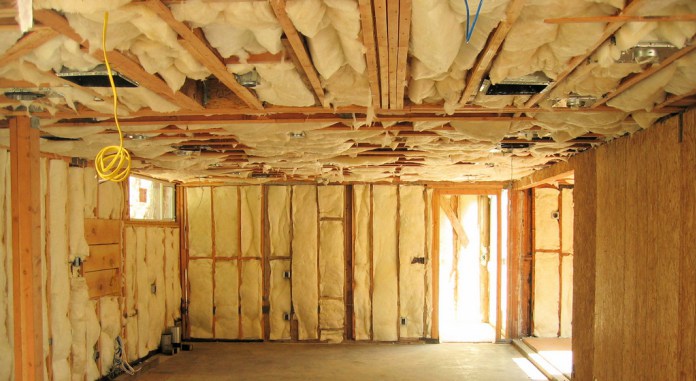
 Roofs can be insulated easily, and the construction has not changed a lot at all over the last 100 years. The way that roofs are built has changed, moving from large structural timbers and purlins to trusses, but fundamentally the layer which is being insulated is still the ceiling joists, whichever era it was built in, they are always insulated in the same way. 150mm thick mineral wool laid between the joists will get a reasonable U-Value of 0.25 W/m2K and laying another 150mm of mineral wool the other way over the timber will get a much healthier U-value of 0.16 W/m2K. If you still want to use the attic space for storage, clever plastic spacers have been designed which you can lay a chipboard floor deck over.
Double / triple glazed windows
A good set of double glazed windows will achieve a U-value of 1.2 to 1.6, which is much better than the 5.0 that a single glazed window will achieve. Triple glazing will get 1.0 to 0.6, which is a significant improvement again, although you can see that you will never get a uvalue like you can in a wall. The next generation is now quadruple glazing which achieves U-values of 0.35 which is staggering and is actually close to being as good as a wall, but the cost is equally staggering.
Another benefit of double glazing is that the windows will be sealed in properly with mastic and epdm seals which prevent draughts, and this can reduce heat loss as much as the insulation of the glass. Other benefits of double glazing is at they prevent condensation on the inside face of the glass, because the two faces are separated and a cold external surface doesn’t come into contact with the warm internal air. They also reduce sound transfer significantly, which can further improve internal comfort.
Traditionally-built homes (Pre 1920)
Solid masonry walls are more complex, and the only solution is Internal or External insulation. In both locations the same materials would be used, i.e. a rigid board in the form of Phenolic, PIR or EPS. While mineral wool can be used internally, they use more space for the same U-value, and if you refer to my Which Insulation page, you can see that PIR works out at a similar cost for the same U-Value, so as you also get the added benefit of space saving, it is an economic solution. Phenolic insulation is the Rools Royce of insulation, but it is a lot more expensive, so it rarely works out as economical. The uvalue of a solid wall will work out at around 3.0. The heat loss from this is similar to a window, so adding insulation has a dramatic effect. 100mm of mineral wool will bring it down to 0.36 and 50mm of PIR will achieve a similar value of 0.35. Given the surface area of the walls, this is often the most significant way to reduce heat loss, and so should be well worth the investment.
Internal wall insulation
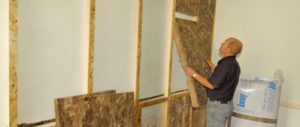 This can be done for £8-10,000 so is a significant expense, but it will have a more significant impact on heat loss than insulating floors, roofs or double glazing.
If the walls of your house are true then you can fix the insulation boards directly to the external wall and plaster the internal face. If you can’t rely on this to give you a smooth internal finish timber or metal lining will take out the discrepancies in the wall surface. All the boards should be butt-jointed as closely as possible, and taped at the junctions.
You need to be careful to avoid potential issues of condensation forming between the insulation and the existing wall. It is important that the moisture in the air is not allowed to get through into the insulation where it can cause damage, so the aim is to create an air-tight layer on the inside face of the insulation. This is done by laying a VCL over the insulation board which is taped and sealed at all junctions, or if you have used a foil-backed insulation, the joints in this can be taped to give a seal which is air-tight enough for this purpose. This is not an ideal junction as you are taping the plaster rather than the foil face inside, which does not form a properly air-tight seal, but the amount of moisture getting through these gaps is minor and not going to have any impact on your walls. However, a separate, fully taped VCL is the ideal solution as it will prevent the movement of any moisture into the wall.
External wall insulation
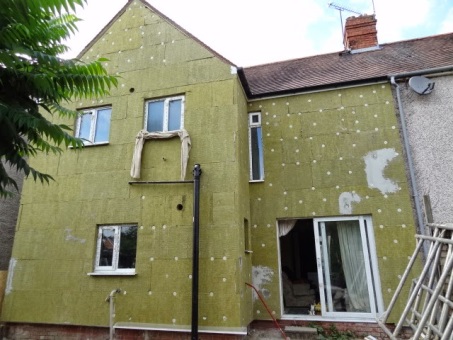 Mineral wool, EPS, PIR or Phenolic insulation can all be used in this situation. Mineral wool in the form of batts (semi-rigid boards) are used, but are less preferable to the more rigid boards, as they are much more robust and resistant to water penetration.
The boards are fixed walls or with an adhesive to the wall behind. A metal (or sometimes fibreglass) lathe is then applied to the insulation which gives something for the render to grip on to. The render will be an acrylic render as these have some flexibility. A cementitious render is a definite no-no as it will crack with any movement of the insulation board below. Not that the insulation will move, but there will be natural expansion and contraction in the board which needs some tolerance to be designed in. If you are planning to clad your building in timber or tile rather than a render, you will need to lay a breather membrane on the insulation, and then fix timber battens through the insulation to the wall behind to give a secure fixing which will carry the additional weight of the timber / tiles or even brick / stone slips. These create a ventilated cavity to the rear of the cladding, which allows the back of the cladding to dry as well as the front, which means that it is not damaged in the long term by by repeated wetting and drying.
The method of fixing depends on the pull-out strength required, so if you are going to render the board externally, you will need to mechanically fix the insulation, but if you are applying a cladding system such as timber cladding or hanging tiles which connect back to the substrate wall, the insulation can be adhesive-bonded. You want to minimise the number of fixings going through to the brick, because even though they are thermally broken, they still form a thermal bridge.
There are a couple of tricky details for external wall insulation, because your house was designed with the wall thickness it currently has, and some of the external features may be affected. Windows and doors will often need a new aluminium extension sill to take the water away from the surface of the building. The eaves may also need to be extended so that they continue to project beyond the edge of the walls.
Ground-bearing slabs
These are tricky and expensive to insulate because you need to raise the level of the internal floors, and so not for the faint of heart. You will need to install a floating floor, I.e. a layer of insulation over the slab with a chipboard deck over the top to prevent the insulation flexing. Most rigid boards can be used in this way, and the choice often comes down to uvalues you are planning to achieve. The definition of a floating floor is that there are no fixings into the slab. The self weight of the floor prevents it from moving about and the tongue and groove in the chipboard creates a joint which prevents movement pretty well.
The installation of the deck is straight forward, but the difficult bit is how it affects everything else. The floor level in your house will change. This affects the steps at the front and back door, the external doors, all the internal doors and the stairs. The doors can be cut although this can affect the appearance especially if they are panelled doors. Even more difficult is the stairs. You don’t want to have a small riser on the first step, and the building regulations require that they are all uniform, because otherwise this is a pretty major trip hazard! To make them uniform, you would need to add packers onto every step to bring it back to a uniform height. This would be a real pain for your joiner, using lots of thin bits of wood, by there’s no reason it couldn’t be done. Alternatively raise the floor level by the height of one riser so that the stair has one less step, but this would affect the ceiling heights significantly as the riser will be around 200mm / 8 inches. As I was saying, not for the faint of heart!
Early 20th Century houses (1920-1970)
Cavity wall insulation
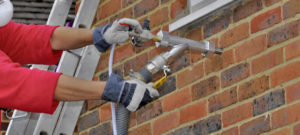 The walls are usually cavity walls, and they are the most straight forward. The cost is very low, around £300-600 depending on the size of the house, and so should be done wherever possible. Filling a 100mm cavity would achieve around 0.35 W/m2K or 0.29 with a high performing EPS bead (grey). This is a specialist job, but installers have found solutions to the most commonly found problems. There used to be issues with blown mineral wool settling in cavities or becoming waterlogged and rotting within the cavity, so it was found that mineral wool was not really a suitable material, so this has been changed to EPS (Extruded Polystyrene) beads. These are non-deleterious (they do not rot). Their performance is not affected by water, and they do not encourage the transfer of water across the cavity because they are water repellent. Another issue which did come up was that the beads all came flooding out of the cavity if a hole was made a few years later, such as for an extractor fan. But this has been overcome by adding a bonding agent as the beads are pumped into the cavity so that they stick together and will not come out of the cavity in the future. There is also the issue of blown insulation in a terraced house, but this has been overcome by running a wire brush through the cavity along the line of the party wall to stop the insulation passing between houses.
Suspended timber floors
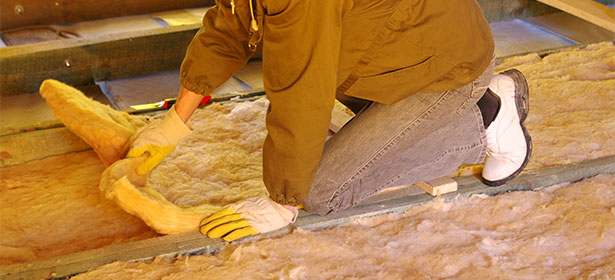 Floors are generally timber, which is also very simple to insulate. If there is access to the crawl space and it is large enough to get in to, it can all be done from below which is the most economic. The only costs are buying the insulation and a fabric netting (to hold the insulation in place) and a staple gun to fix it in place, which will cost a couple of hundred pounds at most. This is a job that you can do yourself as long as you wear gloves and goggles and pay care when cutting the wool slabs, because pushing them up from below is a messy job. The mesh is laid across the underside of the joists and stapled into the joists to hold the insulation in place. It can also be done from above, but this involves lifting the floor boards, which is a time consuming and fiddly job, especially if you want to leave the boards exposed which would leave any damage done to the boards while pulling them up permanently visible.
 One interesting alternative to mineral wool is blown cellulose insulation. I cam across this on a recent project because the owner was keen to insulate without pulling up all the floor boards, because they were planning to sand them down and leave them exposed. Pulling them all up would have been very time consuming and damaged the floor boards so that they didn’t look good when laid back. They also couldn’t access it from below, because it was a flat and they were an intermediate floor. A flexible pipe is run through the space between the floor joists, and it only needs to access from one or two points, so we only needed to raise a few floor boards. This system also allows it to be done from below. A few holes are cored in the plasterboard to allow the pipe to get in, and the insulation is pumped in, and then the hole is filled and plastered over to make good. This is also bit of a wonder Eco-product because it is made from recycled newspaper. Recycling a product which was going to be thrown away, and is in itself wood, ticks a lot of Eco boxes.
Modern Houses (1970 onwards)
Insulated cavity
Most modern buildings have an insulated cavity, and so perform fairly well in comparison to solid walls. The floors and roof are also well insulated so there is less need to insulate and the returns on the investment are much less. If you are aiming for a very well insulated eco-house then there is always more you can do, but the basics are sound.
Timber kit buildings generally have mineral wool in the cavity, which makes them naturally quite well performing, achieving 0.26 with 140 mm of mineral wool within the studs.
Brick and block walls with a 100mm cavity and 50mm of celotex in the cavity achieve a very similar 0.27 or 0.28, depending on whether the insulation is foil backed or not.
This can always be improved with internal or external insulation to improve the uvalue and prevent thermal bridging, but the reductions in heat loss are less dramatic and the hassle and nuisance is less worthwhile.

